


There’s something very satisfying about taking an old piece of furniture and giving it a little facelift.
I’ve inherited a lot of great quality furniture from my grandparents, but in many cases, the wood color was very dated or the finish was worn. I’ve painted these pieces a different color and changed the knobs. Voila! I ended up with beautiful new pieces for my home.
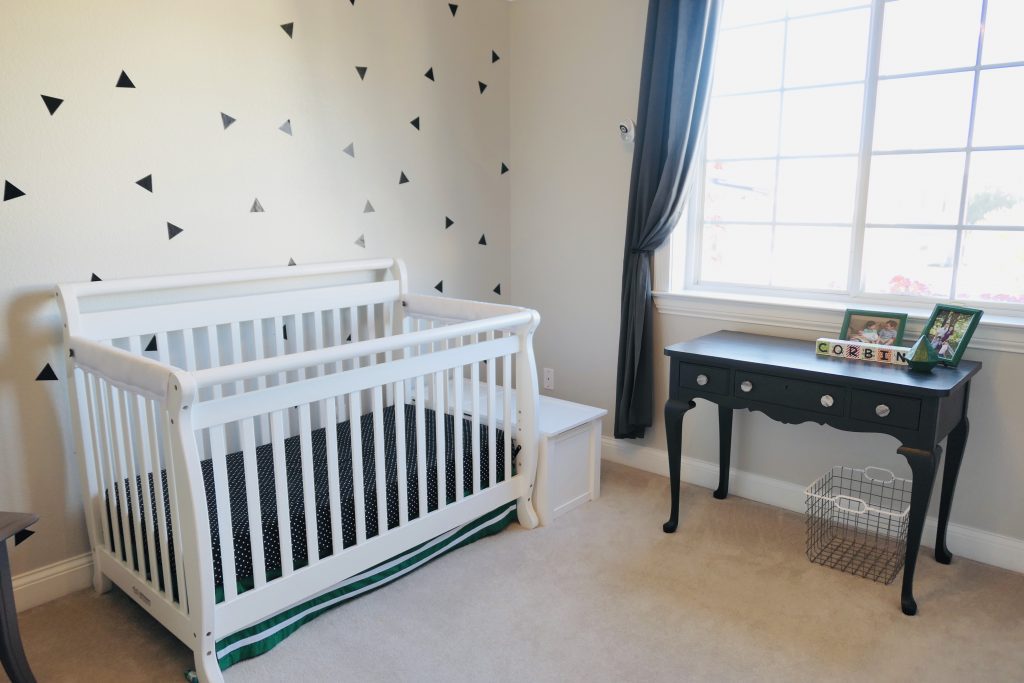
The sentimental value of keeping these pieces is another bonus. I think my sweet grandma would smile seeing her old vanity as a desk in my son’s room.
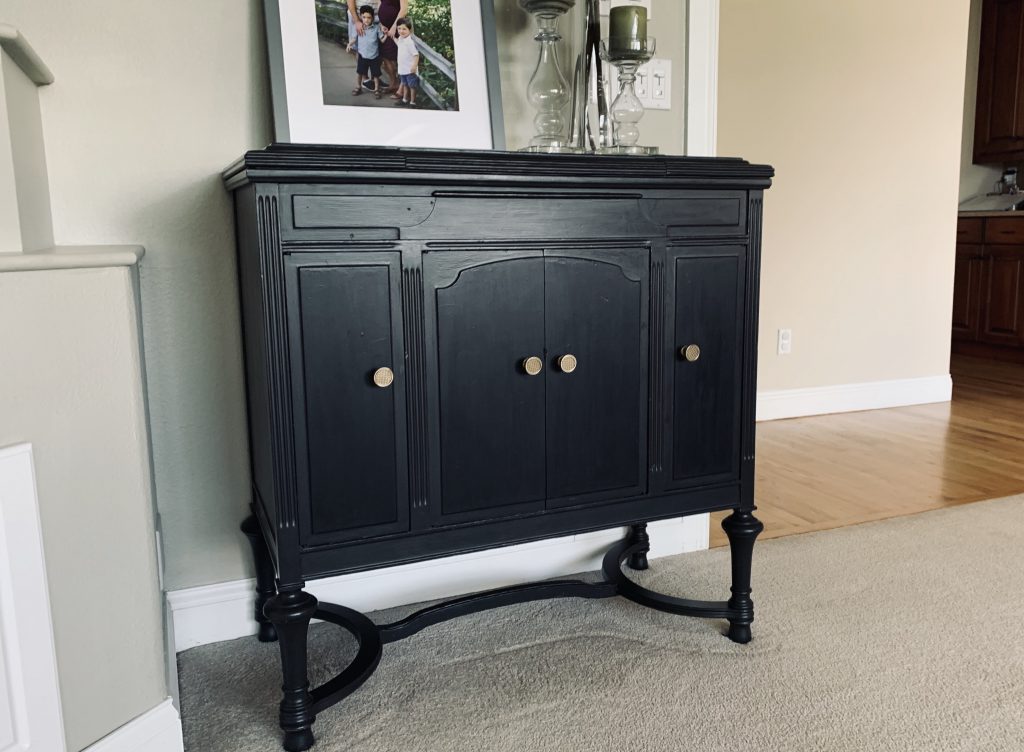
The photo below is a record player that belonged to my Nana and Pappy. Some new paint and gold knobs make this my favorite part of our living room.
Frankly, there is NO possible way I’m going to sand an entire piece of furniture and re-stain it. That’s a big job! The good news is that you can paint old furniture, without sanding, and it comes out beautifully. I’ve painted about 8 or 9 pieces of furniture, and I’ve gotten better results with each one.
Here is my simple step-by-step guide to painting furniture without sanding.
Prep
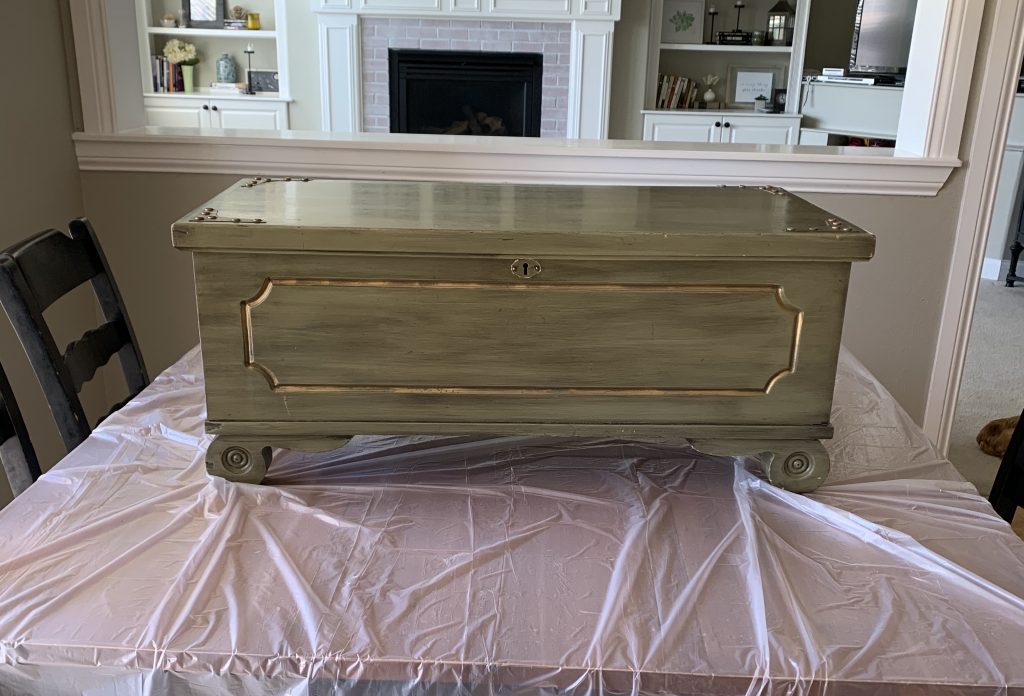
Prep your furniture by removing any hardware you plan to replace. Wipe down the piece to remove dust. Here’s a “before” photo of my latest project, my Nana’s cedar chest.
Prime
Apply a primer to ensure that the paint adheres. This cedar chest had a thick, glossy coating, but primer enabled me to paint right over it. I usually do two coats. Is this an extra step that takes a bit of extra time and money? Yes. Is it better than sanding? Yes! I think I’d rather paint 10 coats than do one round of sanding.
These primers can be found at any hardware store. Look for something that states that it will allow you to paint over glossy surfaces without de-glossing or sanding.
Paint your Furniture
Paint your furniture. I used foam brushes on my last project and it turned out beautifully. Foam brushes are inexpensive and leave very minimal brush strokes. You will probably need two or three coats depending on the project.
You can use any regular paint, but I usually get nervous and use a slightly more expensive paint that is designed for this purpose. Chalk paint is very popular for painting furniture and adheres to almost any surface without sanding. Another option would be a “furniture paint” (which I used on this cedar chest) sold at many home improvement stores. These “furniture paints” are good quality, thick paint that hardens into a durable coating. They also claim to minimize brush marks.
Add a Top Coat
I would recommend applying a polyurethane or polycrylic coating if you want your finished project to survive wear and tear.
Some people recommend applying a finishing wax (especially over chalk paint). On a past project, I painted an end table with chalk paint and finished with two coats of wax. We set a humidifier on this table and soon the paint bubbled up and began to chip. Wax will provide a little protection, but it does not provide a hard, shiny coating that a polycrylic or polyurethane topcoat will provide. If the piece of furniture will experience any kind of moisture or everyday use, then I would highly recommend a polycrylic topcoat.
Apply two layers of polycrylic coating. The instructions tell you to let the top coat dry and then sand in-between coats. Since I truly dislike sanding, I sanded for about three minutes, and the results were still great.
Replace Hardware
If you are replacing hardware, screw on your new knobs or pulls.
One More Important Tip
The more obsessive you become about trying to eliminate brush marks, the more of them you will create. I’ve learned the hard way that brushing over and over the same spot does not make brush marks go away. The best approach is to work quickly, brush over each spot just enough for coverage, and let the paint self-level. If you brush over an area that is already starting to set-up, your brush will leave large, obvious marks in that sticky paint. Professional painters call this maintaining a “wet edge” because you must only brush over wet paint if you want a seamless result. If you are a perfectionist, this will be hard to do, but just try to work relatively quickly and trust the process.
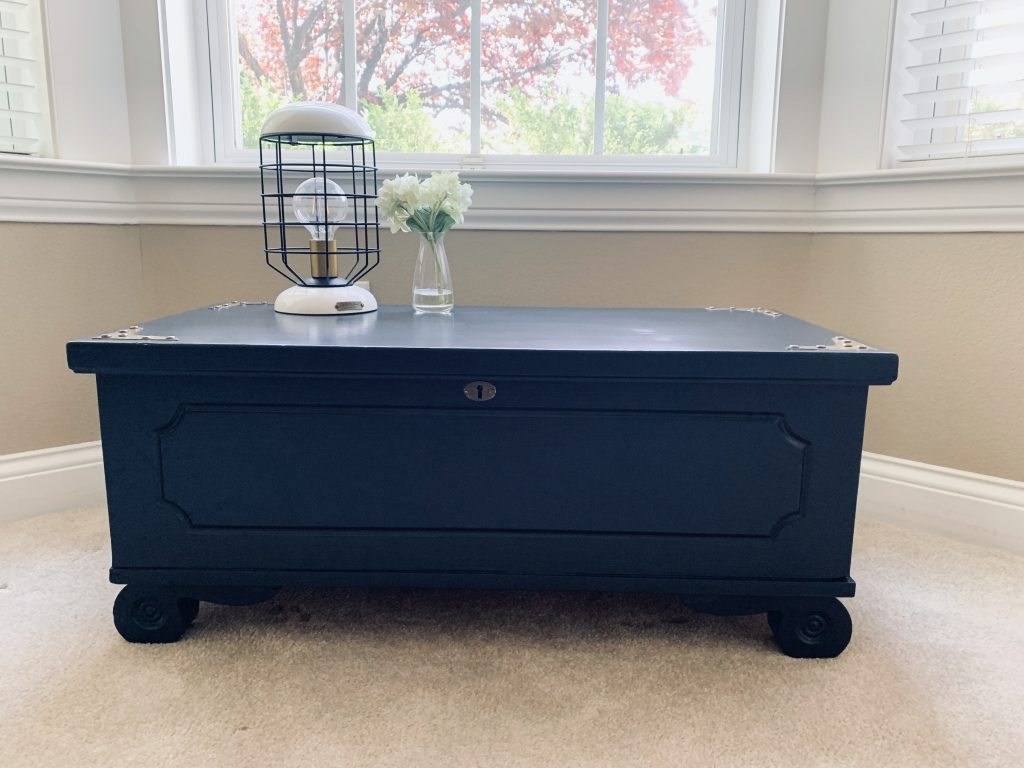
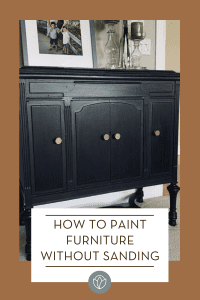
Here is the finished cedar chest. I was thrilled with the result!
Don’t be afraid to jump in and give your furniture an upgrade! For other fun, do-it-yourself projects, check out these creative ideas using thrift store finds or these adorable tents your kiddos are sure to love.
Originally published June 2020.
Pin this post, and follow us on Pinterest.
The opinions expressed in this post are those of the author. They do not necessarily reflect the official policy or position of ABQ Mom, its executive team, other contributors to the site, its sponsors or partners, or any organizations the aforementioned might be affiliated with.


